Soakin’ it Up

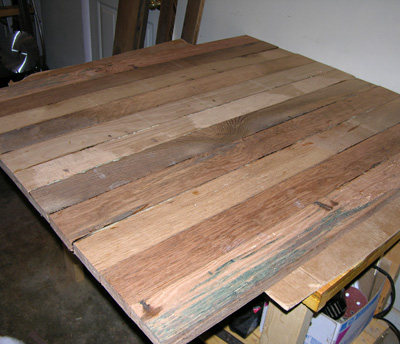
I put a coat of penetrating oil on the underside of the table top halves.

Wood with Oil Finish

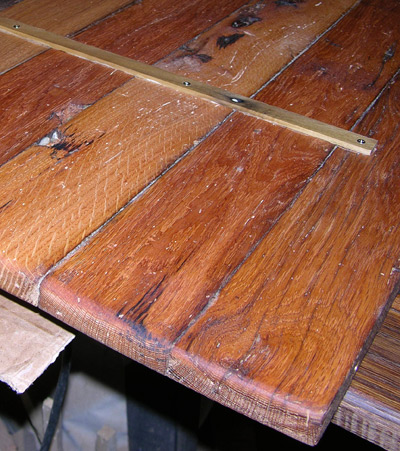
This is the underside and therefore not finished sanded and more rough than the top side but the color is beautiful. I can’t wait to see what the top looks like. Below is a picture of the legs with one coat of oil.

finishedlegs.jpg

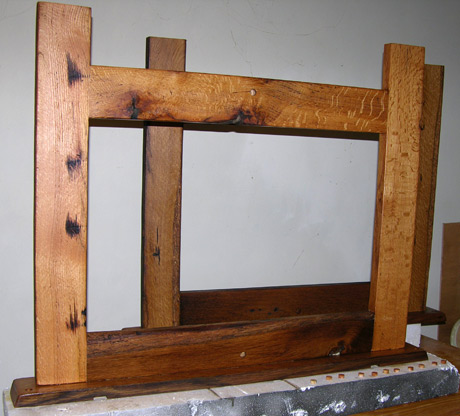
It is just gorgeous. I love the nail scars, the knots, the wormwood, and the grain. This thing is solid and should serve for years and years.

Roughing It

Kelly S.’s dining table is slowly taking shape. Weather and a regular job have hampered progress, but half of the table top has now been assembled. The planks were joined with grooved dowels and a polyurethane glue. I love this glue because it fills spaces, sands well, and holds like, well glue, or at least like glue should. Here are a couple pictures of the first half of the table top–rough though it is. Trust me it will be just gorgeous when it is sanded and finished.

Rough Table Top

This next one is a close up of the greenish spalting in the end plank. Did not see this in the wood for the Coastal Living table. I think it is from metal leaching from nails or roofing. Notice the nail tracing. There are plenty of cool features like this in salvaged wood.

Closeup of wood

Fine Dining: Part 2

I have been commissioned to build another dining table like the one I built for the Coastal Living Idea House in River Dunes, NC. I am very excited about it and asked Kelly S. (the owner of the finished table) if I could blog about it. So, it begins.

Yesterday, in frigid weather uncharacteristic of the South, I drove to Cullman, AL to pick up salvaged oak timbers from Southern Accents Architectural Antiques (see my previous post). These are the same timbers I used for the CLv table. The timbers came from roof supports on an old barn. The guys at SAAA pulled the nails and sawed the timbers in half (roughly) lengthwise. The wood has some really neat features besides old nail holes. There are bug trails and knots and some have really great oak figuring. My next step is to plane it to the proper thickness for the table top. As rough as this is now, it is neat to see what it will become and how beautiful the finished wood is.

Raw Oak TimbersA closer look

For the Birds

I think my muse has returned. Busyness is the enemy of creativity. After an extremely hectic summer and fall things have slowed down to where my mind wanders to making things. This week I saw a pile of wood scraps and a broken shutter as what they could become. So I made a birdhouse for a friend as a housewarming present. The roof is made of the shutter slats–which were the perfect size and shape for overlapping roofing. The sides are made from cedar siding scraps—this I like because it should help the birdies with their parasites. Bugs do not like cedar, nor does fungus. The shell adornment was a souvenir of a trip to the coast and the aluminum flashing used to seal the top was purchased from a home improvement store for a weather proofing project around the house. This was a pretty quick and easy project and it made a fine gift for my friend’s new home. I intend to make a couple more as gifts.

Green Birdhouse

Here is a second birdhouse I built as a gift. I am going to post a measured drawing here as well so you can knock one out at home. All you need is some wood, a saw, hammer, drill, and nails.

Birdhouse

Fine Dining

Dining table built for the '07 Coastal Living Idea House
Photo by Jean Allsopp

Some projects are too good to pass up, even if they are huge and you have a regular job. I finished one recently for a 7ft by 4 ft dining table custom built for the 10th Anniversary Coastal Living Idea House in River Dunes, NC. It was a lot of fun to build but a handle to get finished on time.

I was given two pictures by the designer who said “can you take this part of this picture and use that part of this other picture and make a table?” Well, yes. The wood came from Southern Accents in Cullman, AL and was reclaimed red oak timbers from a barn. Rustic as the day is long!

The challenge came in getting the joints to line up well. The wood was simply beautiful–loved it. [See pictures of it here] I made it in 5 pieces that connected using minimal hardware. Shipping it was a challenge, but upon arrival everyone was happy. It looked good in the house which was photographed in August and will appear in the November issue of Coastal Living. They did add a slight stain to the top to make it better match the wood flooring and lessen some of the redness of the wood. I liked the original penetrating oil finish, but I loved how the table looked in place with the chairs and settees.

This was a great project and I am so pleased to have had the opportunity to showcase how beautiful reclaimed wood can be. I hope to have additional challenges to make something old new again.