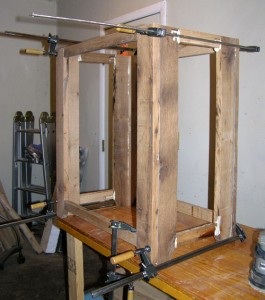
 The cabinet for the Birmingham Symphony Decorator Showhouse is beginnning to take shape. This first picture is of the frame made of red oak barn timbers from northern Alabama. There are some really cool knots, nail holes, worm-wood, and rough sawn places that make this wood very interesting and rustic. The majority of the cabinet is going to be crafted from this stock. I plan to use fall peeled maple for accents.
Shell Robe Hanger
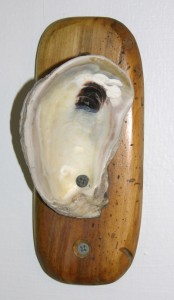 This was a quick project that I finally finished. I had the oyster shell sitting around for a couple of years and had planned making this since I found it in my travels. The wood was a leftover from a king-size bed I built for a friend out of Indiana poplar.
I love that wood! It has so much character and interest, in its coloring, the grain and from the insects that had a party there during storage.
Anyone could make this with limited tools. You would need a handsaw or scrap wood already the size you wanted for the mounting plate, a drill, a shell, sandpaper, three screws, some epoxy, and wood finish.
The limiting steps in this are drilling the whole in the shell—I used a Dremel tool—but an electric drill and some patience will do the trick. The drill bit will get hot—pause periodically to let it cool.
Try to find a shell of sufficient length with a flattened edge that will sit flush against the mounting plate. You can sand this flat edge to make it more even. Depending on the shell, you may want to sand the edges a bit to take some of the sharpness down or get rid of barnacles. The shell is calcium carbonate—the smell may remind you of the dentist.
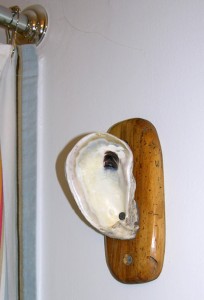 Shaping the mounting plate took some patience too, but that is the beauty of woodworking. Once it is shaped just like you like it, place the shell, measure and mark the spots for the two mounting screws and the through the shell screw. Drill pilot holes for the mounting and through screws and countersinks for the mounting screws.
You can finish the mounting plate with about anything you want. Paint it if the wood is not all that interesting or use a stain or a natural finish. I used some left over teak oil to penetrate the wood and then followed it up with a coat of paste wax applied with a steel wool pad. I think this is a supremely natural, but protective finish.
Make sure you choose a screw to mount the shell that is not so long it will stick out the other side of the mounting plate. Secure the shell with a small amount of epoxy, like JB Weld, and a wood screw. Be careful not to over tighten and crack the shell. Let this dry overnight.
That is it. It is ready to mount wherever you choose. I used some self-drilling dry wall anchors . If you would like some measurements, let me know and I will post them. But really it is up to you. If you have more than one shell, you could mount them in a series on a wider piece of wood.
My Wish List
It has been cold here lately. Colder than normal for Alabama. This leads me to dream and shop rather than be in the shop working on projects. This was made worse by the arrival of a huge catalog from Woodworker’s Supply.
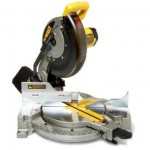 On my wish list are a compound miter saw and a couple books. I have been looking at saws for a while. I want one that is versatile, sturdy, compact, and cost-effective. The front-runner is the DEWALT (DW713) 10″ Compound Miter Saw
 for as little as $190. It has gotten great reviews, too. Because my usual modis operandi for buying tools is to have a specific project that requires them, purchase will have to wait for a looming kitchen revamp. Soon…..
Books do not have to wait. I am going to buy a highly recommended and newly revised reference book Understanding Wood 2nd Ed.. This one is not currently in my library, but should, and will be soon.
It is time for spring and warmer temperatures—budgets cannot support many more days of cold weather dreaming.
Local Press Mention
Writhing Wood
Bruce, at Redwood Bench and Table Co. in Mitchell, Oregon sent me the coolest picture of twisted western juniper. I had never seen wood like this. I guess it grows this way. Bruce says he removes the bark with a pressure washer. That method appeals to me as my normal method is very low-tech—a pocket knife and some elbow grease.

If you are interested in purchasing some of this writhing wood, I bet Bruce can fix you up. You can contact him at 541.462.3232. Check out their web site to see some really cool beds, lamps, and tables.
