Improvement!

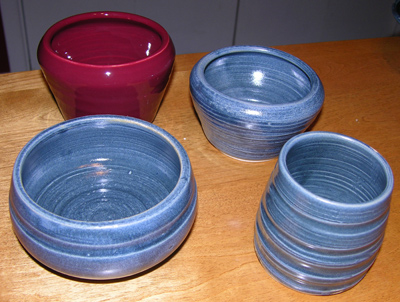
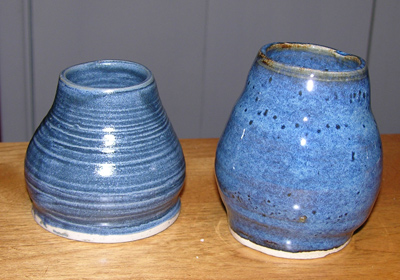
I can really see how my limited skill as a potter has improved. Of course, I had no where to go but up. I don’t know how it happened but I was able to make some nice bowls that I can actually use as serving pieces. I also made a small plate on the wheel–I am told that plates are difficult. There were so many talented people in my class who made much more difficult pieces, but I am very pleased with the loot I brought home. I love the blue glaze and the red also turned out very rich. I tried some spotting for artistic effect with a white glaze and I kind of like it too.

BowlsMore Bowls

Experiments in Shaping

I finished my latest round of classes at Cahaba Clayworks. Just to finish up my last round, I found my “experiments in shaping” that had been bisque fired and finished them up. I do not know exactly what these might be used for but I think they might have a function as a pencil holder or as a weird flower vase.

Shape Shifting

This is a lovely glaze called varigated blue. I used it a lot on the finished pieces from this last go round.

Progressive Dinner

It is beginning to look like a dining table, or at least the parts of a dining table. There is only one piece of the 5 left to be assembled–the center crosspiece. I have done the math and plan to cut and assemble it tomorrow. Believe it or not, the trigonometry/geometry I learned years ago does come in handy at times. I used the good old Pythagorean theorum to figure out the lengths of the pieces I will need to form the crossed members of the center support.

This picture shows the underside of one of the top halves. I added some thin strips to the underside. The glue has to be removed and it needs a final sand.

table top underneath

Here are the leg supports. They need some hand sanding to remove glue residue but otherwise these are ready to be assembled to the crosspiece when it is finished.

Table legs

Dining Table: progress

This weekend was beautiful here in AL. So, I was able to make progress on Kelly’s dining table. This first image shows one half of the top (leaned up against the wall), one of the leg supports, and the second half of the table on the floor. The larger spots on the table top have been filled and sanded to medium grade. Final sanding will wait until just before finishing with a penetrating oil. The leg support pictured has not been rough sanded yet. The second half of the table top is still about 10″ short of where it needs to be so I have a few more planks to fit.

Table Progress

The second leg support has been fitted and joined but the glue is drying as of now.

Table Leg Support

So it is coming along. It is going to be rustic and beautiful!

Sawdust

Time to plane more of the timbers. Reasons: 1) need some a bit thicker for the table supports and crosspiece, 2) need some more 1″ thick for the table top. Fitting the planks in the table top is an art and a science. Because of their age and exposure to the environment each timber has unique features. Often these include warps and twists in the lumber that make them less than straight. So when fitting these planks together lengthwise, it is often a matter of matching the slight curves. Not a horrible task, but I needed more options for the second half of the table top. Thus far it is about half the length it needs to be.

Polyurethane Glue

Notice the glue exuding from the butt joints. This is the glue I mentioned in my last posting. This one is Critical Bond from Moser’s. It is my favorite glue. I have tried a bunch of others, Gorilla Glue, Excel, even an Elmer’s take on it. The two best I have used are Critical Bond and Excel. Caution: If you get it on your skin and it dries there, it has to wear off. Before it is cured, it can be wiped off with mineral spirits.

Regarding sawdust, or in this case shavings, always plane outside. It makes a huge mess. (and this is nothing compared to the first batch of lumber I trimmed down for the table top)

Just Plane Shavings