 A friend asked me to build some steps for her aging dog to use to get up into the bed more easily. I did some research and modified a plan to suit her needs.
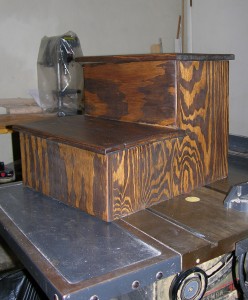
Construction is really simple and could be done with a hammer, Phillips screwdriver and handsaw, if that is all you have. I used ¾” plywood for the stair supports and back so using a power saw was beneficial. If you wanted to use a handsaw, I recommend adjusting the measurements for standard 8″ x 1″ pine boards. If you want to make something really nice for Fido, use birch plywood or oak lumber available at most home improvement stores.
You will need some wood glue (preference for polyurethane), 1 ½” finishing nails, wood putty, sandpaper (medium to fine), 12″ piano hinge, and a couple 6″ pieces of scrap and short nails to hold up the interior shelf. The piano hinge is used to attach the top stair so that you can store treats or toys under the top shelf.
For finishing, you can stain before or just seal with paint or polyurethane. I used a walnut stain and a satin polyurethane.
Because dogs prefer carpeted stairs for sure-footed-ness, I recommended getting one self-stick stair tread runner that could be cut in half, one for each of the stairs.
You could knock this out over a weekend and give your pet a leg up on getting into bed.
 With the deadline looming, I have been working like crazy on the cabinet for the
 The cabinet for the

