Chair Caning Help

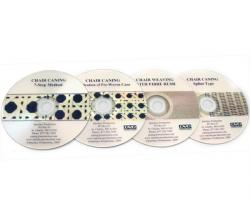
There is a new DVD set on Chair Caning that I wish was around when I was teaching myself to restore chair seats. The four DVD set ($79.99) covers the 7-step method, pre-woven cane, fibre rush, and splint-type weaving. If you only are interested in one aspect of seat weaving, you can buy any individual DVD ($24.99).

As for books, I can personally recommend Seat Weaving by Ricky Holdstock and Chair Seat Weaving for Antique Chairs by Marion Burr Sober. The former is a great resource with lots of pictures. The later is a 64 page booklet with line drawing diagrams, glossary, and easy to follow instructions for hand caning, rush weaving, splint weaving, and Shaker tape weaving.

Here are some online resources for instruction:
Style-iscious

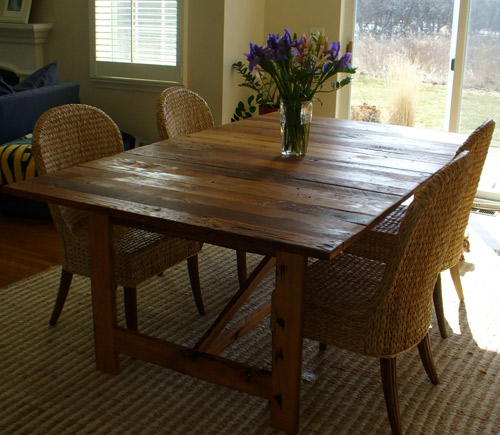
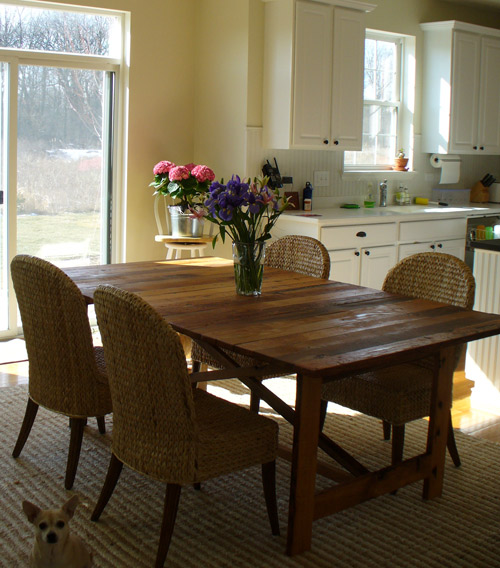
Kelly sent me pictures of the ‘Coastal Oak’ (that is what I am calling that style/design) table in her home with the chairs and rug. I love it and she is pleased. Here is what she said:

The table looks absolutely wonderful. As you will see in my pictures my dogs love to be in front of the camera. It turned out perfect and just like I had hoped. Thank you very much! The “S” household is extremely pleased.

I had not see the legs on these chairs before. They have a cool rustic character that adds to the whole look. I think the rug and the seagrass chairs are a cool contrast to the various colors/features of the salvaged oak timbers. I am not sure where the rug came from but I think the chairs are from Pier 1.

Update from Kelly: BTW…the chairs are from Pier 1 and the rug came from West Elm. I really tried to put some thought to the look and it all came together as I had hoped.

Kelly’s table

Kelly’s table

It Arrived

Last week I bubble wrapped each piece of the table within an inch of its life and then loaded it all in my truck and carried it to the local mailing/shipping shop. The guys at Parcels Too in Trussville were great! They figured out a way to get it to Kelly S. within budget and further wrapped and boxed it up very professionally. The folks at Roadway got to Kelly’s on Tuesday (we had a tracking number so we could watch it travel from here to there) and she was successful in getting it into her house–even if they Roadway guy didn’t think they could do it themselves. I bet she has a pile of packing material–I really hope she can find a use for it rather than just throwing it away. Reuse, recycle, renew.

She is going to send me a picture with the chairs she chose (from Pier 1) and I will post that here when I get it. I think it is going to great with the chairs.

Base of Support

Progress continues on Kelly’s dining table. The two halves of the top have been rough sanded and the table base is almost complete.

Table Support

Remaining steps include fitting the two halves using alignment pins, placing the attachment points for the two halves, finish sanding all the parts, and application of the penetrating oil finish. Then it will be heavily bubble wrapped and packaged for shipping by Fed Ex. If the weather cooperates, I hope to do this my next weekend or shortly thereafter. It looks good and is solidly built. I made a couple improvements to the design since the initial table was built. I hope Kelly likes it when it is in her home. She has picked some fabulous chairs from Pier 1 that will complement the rustic nature of the piece and add some style and class to the dining set.

Fine Dining

Dining table built for the '07 Coastal Living Idea House
Photo by Jean Allsopp

Some projects are too good to pass up, even if they are huge and you have a regular job. I finished one recently for a 7ft by 4 ft dining table custom built for the 10th Anniversary Coastal Living Idea House in River Dunes, NC. It was a lot of fun to build but a handle to get finished on time.

I was given two pictures by the designer who said “can you take this part of this picture and use that part of this other picture and make a table?” Well, yes. The wood came from Southern Accents in Cullman, AL and was reclaimed red oak timbers from a barn. Rustic as the day is long!

The challenge came in getting the joints to line up well. The wood was simply beautiful–loved it. [See pictures of it here] I made it in 5 pieces that connected using minimal hardware. Shipping it was a challenge, but upon arrival everyone was happy. It looked good in the house which was photographed in August and will appear in the November issue of Coastal Living. They did add a slight stain to the top to make it better match the wood flooring and lessen some of the redness of the wood. I liked the original penetrating oil finish, but I loved how the table looked in place with the chairs and settees.

This was a great project and I am so pleased to have had the opportunity to showcase how beautiful reclaimed wood can be. I hope to have additional challenges to make something old new again.