Built-in Shelves Finished

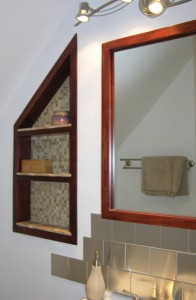
Finished the built-in shelves a while ago but forgot to post a pic and details since last post on the process. [The trouble with digital media storage is that it is easy to forget what pictures you have on the card.]

I framed the exterior of the shelves with stained ¼” x 2″ poplar lumber purchased at Lowes. The stain was the same red hickory used on the mirror frame followed by sealing with satin polyurethane. Cutting the angles was a bit difficult but the obscurities of my college trig class finally came in handy.

The back-splash is an easy to use product from Improvements (#337192, $27)—aluminum metal wall tiles. They are advertised as “will not crack, chip, or stain” and easy to install. The later—I can confirm—installation was so simple!

Each box of tiles contains 48 4 x 4 tiles and double adhesive foam for affixing  the tiles. The tiles come in almond, aluminum, black, white, chrome or copper and in triangle shaped to spice up your design.
Built-in Bathroom Shelves

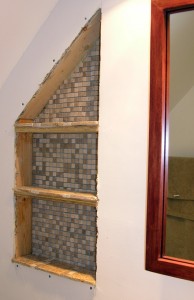
Unfinished built-in shelves

In a small bathroom space is at a premium. Recently I replaced a vanity and counter-top  that ran the length of a bath with a European-style, shallow-profile vanity. At that time, a new light fixture and a re-framed medicine chest were added.

While those improvements were needed, the reduction in counter and under-sink storage space were a problem. So, built-in shelves were next.

Finding the studs was the first step. A standard stud-finder worked like a charm and from there I could measure out the 16″ centers and start taking out the drywall within the selected space. (interior space between studs is normally 14.5″ unless you have an unpredictable old home or a nutty contractor built the wall)

Once the drywall was punched out using a flat-head screwdriver and a hammer (most efficient way I have found), a couple shelves of 3/4″ plywood were cut and  inserted. Friction plus some wood glue made for a good tight and permanent fit.

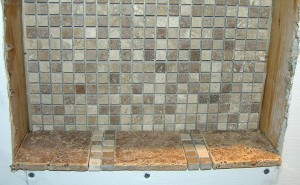
Built-in shelves, close-up

I used some left-over 4 x4 stone tile ($5/sq ft) for the main part of the shelf tops and some smaller squared sheets ($10/sq ft) for shelf accents and  the back of the shelves. After tan grout is worked into the cracks the shelf under sides and frame will be completed with poplar stained to match the mirror frame.

Medicine Chest Update

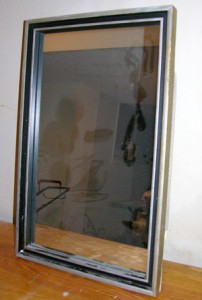
mirror-beforeIn the process of updating a bathroom trapped in the 70″s, I had to make a decision about the medicine chest. To replace or redo. The chest itself had nothing wrong with it except a worn, out-of-date frame around the mirror.
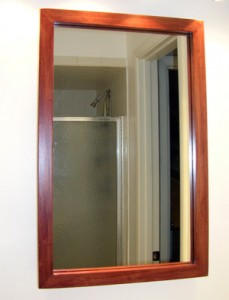
Rather than contribute to the volume of junk in the local landfill, I opted for replacing the frame. I took the chest out of the wall and disassembled the mirror from the metal box. It was held there by about two dozen screws.

The metal box needed a bit of light sanding and a quick spray paint job. The mirror was in perfect shape and really was a very nice piece of electroplated glass. Probably cannot buy one this nice any more.

mirror-afterThe replacement frame was made with mitered corners from standard poplar purchased at Lowes. I bought a European-style narrow profile vanity from the local box store. It had what the manufacturer called a Cherry finish. Trying to match that color required testing several different stains on scraps of the poplar. The final choice was one by Cabot called Red Hickory. I put one coat of the stain on followed by one coat of satin polyurethane. A light pass with fine steel wool followed by another coat of finish was all it needed to match the finish of the vanity.
Total cost of the project: $20. Compare that to at least $100 for a new medicine chest. Love it.

Mud Wrestling: Round 3

Ever seen pictures of the aborigines where they are covered in white clay from head to toe? I looked at myself in the mirror after my latest pottery class and that is what I saw. White clay in my hair, on my face, halfway up my arms, and all over my clothes. A particulary messy passtime–but oh, so satisfying.

I am on my third round of pottery classes at Cahaba Clayworks. It had been a while due to a hectic fall and early winter. I thought I would forget alot of what I had learned, but it is like riding a bike (even if I am still on training wheels). Much came back and Larry (the teacher) was there to explain a couple new things. I am not sure where I am going with this round of classes but I hope to make better pieces than the last time and figure out how to see what the clay wants to become and shape it accordingly.

If you have the opportunity, get out there and get muddy.

Physics Rules

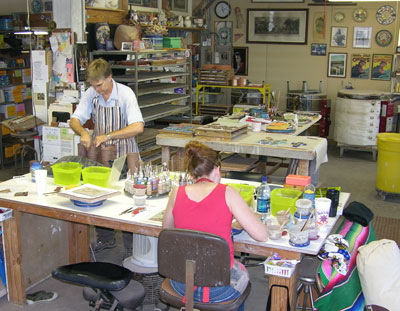
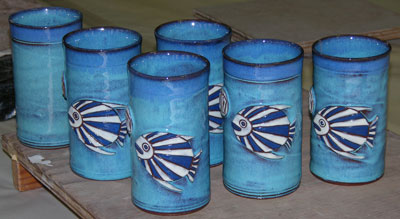
I just returned from a trip to Corpus Christi, TX where I had the good fortune to meet Ed and Cornelia Gates of Aloe Tile Works. Walking into their shop was a totally random thing and so fortunate for me. They make custom tiles from red clay and paint them using a pigmented clay. Beautiful work that is garnering a lot of local interest in TX. They have done some very big tile mural projects for the state and schools and they do a lot of “ceramic certificate” work (plaques commemorating events). They also do custom tiles for home projects like backsplashes and bathrooms. They showed me beautiful crosses, Christmas ornaments, and mirrors they have custom made. Just beautiful!

Aloe Tile

Ed is the Potter there and Cornelia is an-ex lawyer turned artist/organizer of the place. (This is an over simplification, of course.) They were both so warm and generous with their time. They showed me around their Studebaker-garage-turned-pottery studio and the adjacent gallery which is housed in the showroom of the former dealership. Ed explained their processes and I asked a lot of questions. Both he and Cornelia were so generous with their time. I could have hung around for hours chatting and watching the processes.

Mugs

A light bulb came on as to another reason (besides the availability of clay in some locales) why many great Potters take up residence on the coast. [ Shearwater /The Andersons for example] Ed says it is the humidity. This allows the artists more time to work with the clay without it drying out. So it comes down, again, to physics. If only my physics classes had explained the effect of this most basic science on real life rather than focusing on equations and fuzzy math.

Thanks Ed and Cornelia! You remind me that there are cool people doing what they love and creating beautiful/meaningful things all over the country.