Clementine Crate Birdhouse

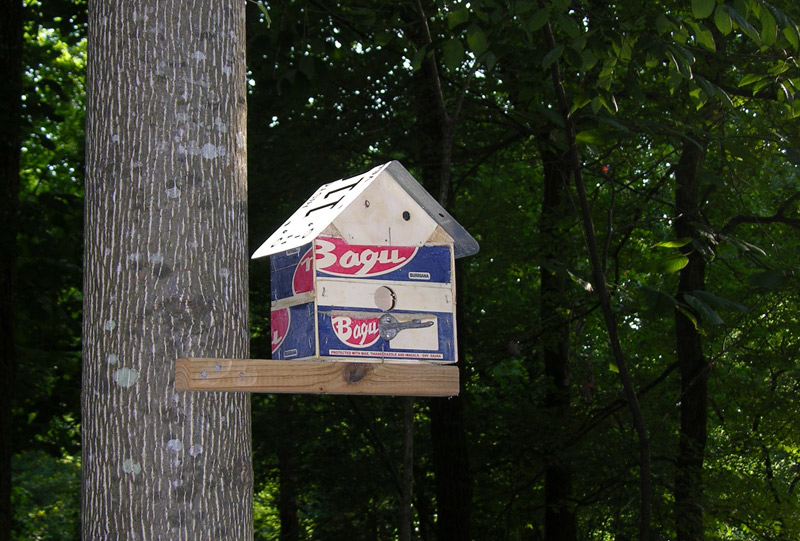
Clementines make winter seem shorter and they are very tasty. I go through a bunch of them when they are in season. So, I had several of clementine crates sitting around that I could not throw away. What to do with them? Hmmmm.

A birdhouse, yeah, that’s it. Can’t say if a house made out of these light wood crates will last in the weather, but it is worth a try. With a sturdy roof made out of an old license plate, they just might.

I used a power saw to cut the crates because I have one, but a hand saw or even an Exacto knife might work to cut the thin plywood. The corner pillar pieces are used at length, so there is no cutting required. An electric drill is also helpful in this project.

The slideshow below shows the major steps to assembling a birdhouse from these raw materials. If you have questions, just leave a comment or email me.


On the question of what to use for a perch: it is up to you. I used an old cabinet pull on one example and a coat hanger on the one shown in the slideshow. This is where you can get creative. Use whatever you like. I would suggest you keep it light because the plywood of the crates is thin.

To finish or not to finish: I used a single coat of polyurethane finish on the outside of this birdhouse because I had some leftover and I thought it might help weatherize the structure a bit. For your creation, it is your call.

Finally, if you should try to do this at home, I would love to see pictures of your creations. Send me a picture or connect with me on Pinterest, Facebook, or Twitter to share.

Birdhouse Plan

Finally, I took the time to write down/draw the plan I used to make birdhouses that I posted here some time ago. I made another house from standard pine lumber leftovers and made this drawing. It is based on 3/4″ thick lumber, so you may have to adjust if you use something thicker or thinner. One thing absent from the drawing is a 6″ x 1 1/2″ piece of aluminum flashing that I nailed to the top of the roof to cover the gap between the sides of the roof.

I used pine this time, but I prefer using cedar or something more weather resistant. If you use pine, paint or stain it the exterior with a good exterior oil-based enamel or penetrating oil–preferably a penetrating oil. If you can use cedar, then no finish is necessary.

Unfortunately, I gave the birdhouse away as a gift before I remembered to take a picture of it. But it was similar to these.
Download birdhouse plan

For the Birds

I think my muse has returned. Busyness is the enemy of creativity. After an extremely hectic summer and fall things have slowed down to where my mind wanders to making things. This week I saw a pile of wood scraps and a broken shutter as what they could become. So I made a birdhouse for a friend as a housewarming present. The roof is made of the shutter slats–which were the perfect size and shape for overlapping roofing. The sides are made from cedar siding scraps—this I like because it should help the birdies with their parasites. Bugs do not like cedar, nor does fungus. The shell adornment was a souvenir of a trip to the coast and the aluminum flashing used to seal the top was purchased from a home improvement store for a weather proofing project around the house. This was a pretty quick and easy project and it made a fine gift for my friend’s new home. I intend to make a couple more as gifts.

Green Birdhouse

Here is a second birdhouse I built as a gift. I am going to post a measured drawing here as well so you can knock one out at home. All you need is some wood, a saw, hammer, drill, and nails.

Birdhouse